in their own bow making adventures..
I am using a large size 5" wide roll of burlap for this bow.. while generally a bow will be made with much smaller ribbons.. hopefully using such a large scale for a tutorial will make it a little easier to show you.
Let's get started..

I have my supplies ready to go.. a wreath, floral wire, wire cutters, scissors (not in photo), and roll of burlap.
First, I unrolled a couple feet of the burlap.. (leaving it attached to the roll for now)
Lay it flat on the table with the end folded over about 6.5 to 7 inches.
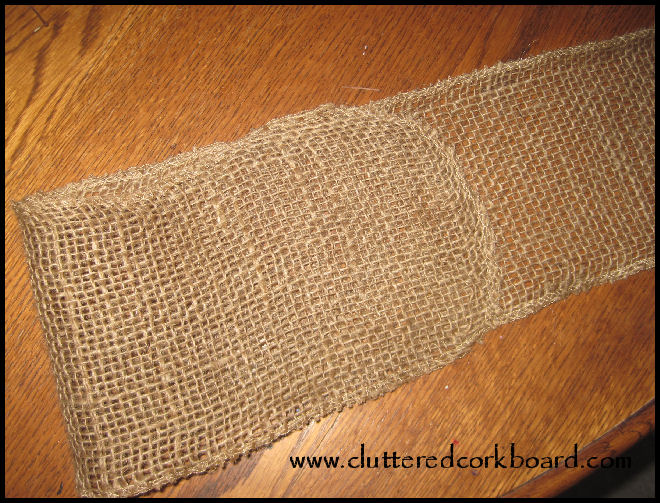
Next.. take the other side of your burlap, and fold it over leaving slightly less length (about 6") from the center point, leaving equal length on both sides of center point.. (see photo below)
The starting point of the burlap was placed a little longer so that it is pass the center mark.. it needs to be longer than the center point, so that when you pinch it off to secure your bow the end will stay put and keep your bow nice and neat. The black dotted line in the photo below shows where the starting point
of the burlap is.. to show you how it is overlapping the center point.

Now is where it was hard to take photo's while working with the burlap at the same time, my apologies.
At this point you take the burlap that you are holding and hold it up from the center of what you have done so far... this is basically to get an idea of how long your want your "tails" to be for your bow.. so just decide how far you want the ends to hang down from your wreath.

When you have decided you are happy with the length.. cut the end piece only.. from the roll of burlap.

Now you take that piece and fold it over to overlap with the rest of the burlap you have on your table.. being sure the end is inside and there is a loop. (see next photo)

This is what it should look like at this point.

Now cut a piece of wire about 15" long.. place it under the entire bunch of overlapped ribbon in the center.. (I left the wire attached to the spool, but it is easier to just cut a long piece)

Pick it up from underneath and Pinch the bow section in your fingers with the wire, (being sure to keep it laying the way you had it laying on the table) and then take the loop that is there for the
tails of your bow and stretch it out a little so you can see where you would like to cut it. (be sure to keep the bow part pinched tightly)

Then use your scissors to cut the tail loop in half however you would like. (angled, straight etc.)

Now you just twist your wire until it is tight.

Now you can attach it to your wreath with the wire.. by just twisting it around or through your wreath.

Love this look..
You can also use any size of ribbon to make this style of bow, you will just need to adjust the sizing..
The smaller the ribbon, the smaller you will want to make the loops.. and so on.
Hope that helps give you an idea at least of how to make a basic bow and secure it with floral wire.
I thought I would show you where I put it..
I placed my new 'rustic' wreath at the top of my Leaning Ladder Shelf that I recently made, and I also gave that boot (shown in above photo) a light wash with aqua blue paint for a pop of color. :0)

I am really liking the Aqua blue pop of color.. adds a touch of whimsy I think. :0)


No comments