I was able to stop in a flea market for a quick look around last Friday afternoon and I saw
the cutest decorated Welcome Post signs.. one had puppies on it scattered here and there with a fire hydrant at the base of it, another one was painted in cow print, complete with a cowboy hat birdhouse on top, boots with plants coming out of them, and hay, as well as a 'cow pie' at the base among many other details.. they were very elaborate to say the least! (not sure why I didn't take a photo - my bad! maybe next time..)
I have also seen some pretty basic ones before, which I kind of prefer.. besides that, I have no idea where they found all those adorable accent pieces they had on their posts.. such amazing detail.
Well, I had been wanting to make one to place near our deck.. and after seeing those,
I decided to see what we could come up with.
From our scrap wood pile of course.. Yep, this project is going to be a no cost project.
So my husband helped me out and he cut a 4x4 post for me at 3 1/2 feet, as well as a board for the base.
Then we attached them together..
Then I gave it a coat of white paint..
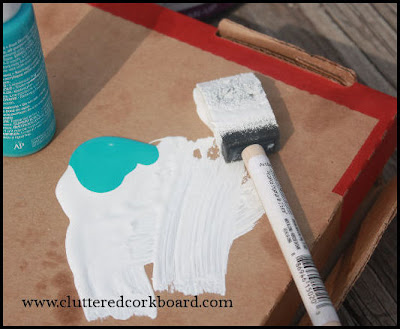
I wanted to add some color, so I mixed some aqua with white and lightly brushed it on here and there.. (yep, I mixed them on the back of a pizza box) :0)
I also added some black along the edges and lightly in different area's to give it a slight distressed look.
I had this old wooden plaque laying around that use to hang outdoors, but the picture had faded off of it.. so I gave it a makeover by painting it aqua to use as my sign.
However, I wasn't sure what I wanted to put on the sign.. so I debated a few things..
Such as our house number, or last name, or Welcome..
I ultimately chose "Welcome" and using a sharpie.. I wrote it on.
I am really pleased with how it turned out.
I actually intended to buy a fence post cap or topper to add to it, and to look for a decorative metal hook to place on it.
However, I decided to keep this project a zero dollar project.. yep.. No cost!
So in my craft supplies I came across a small piece of wood, that I used for the top and painted it to match, added a white cup hook to the front, and since I am giving an old drawer a makeover right now for another project.. I used the drawer knob for the top.
I kinda like the unique touch of the antique glass.
Total cost for this project, because we used only what we had on hand - Zero..
Yep, Those are good kind of projects.. :0)
linking up at:
Inspire me Tuesday,
Motivate Me Monday,
Craft O Maniac Monday,
Masterpiece Monday at Boogieboardcottage,
Nifty Thrifty Tuesday,
Sizzle into summer,
transformation Thursday,
Pinterest Power Party,
Flaunt it Friday, I Heart Organizing


Oh I love this idea, your welcome sign is so pretty and I love the post. This was done years ago in all the fashionable homes. So happy to see it being done again. Thanks so much for joining Inspire Me. Hugs, Marty
ReplyDeleteThank you Marty, so glad you stopped by!
Delete-Tina
Tina, you are so creative and I love how you used what you had on hand! This is super cute...:) I may just have to make one of these! I have been wanting to display my house number....May be I'll try this! Thanks fir inspiring me!
ReplyDeleteBlessings, Vicky
Life On Willie Mae Lane
You are too kind.. and I love using stuff we have if we can help it.
DeleteYou should make one!
Have a great day.
-Tina
I really like, good for you! I saw some similar to this recently, guy was selling for $40. They had solar lights on top, I think I'll try to make one. #475 on my to-do list, ha ha. Take care - Dawn
ReplyDeleteI actually thought about putting a solar light on top.. How funny is that? But decided not too, since I have them on my deck posts, as well as the landscaping around it.
DeleteYay for to-do lists.. I hear ya though, I do believe mine is close to that long as well.. ha..
Have a great day, and thanks for stopping by.
-Tina
This is really cute. Trying to think of where I could put one just so I have a reason to make it:)
ReplyDeleteHeather @ lovetobebusy.blogspot.com
Thank you Heather..
DeleteYou should definitely make one. :0)
-Tina
This is incredible! I love that it was a zero$ project! You're my kind of DIY-er
ReplyDeleteHi Patti,
DeleteThank you..
I think no cost projects are definitely some of the best kind. :0)
-Tina