I hope you are having a wonderful week so far, I am getting back to another DIY project
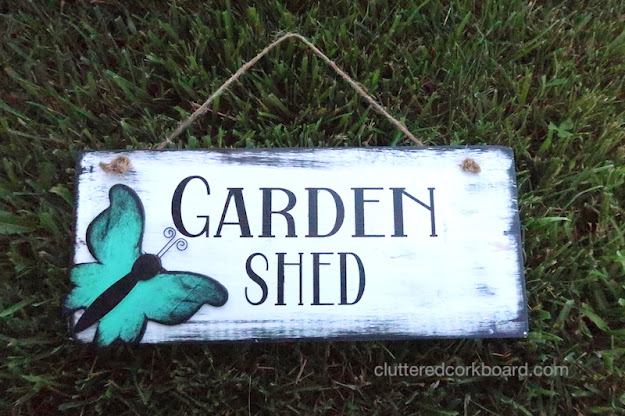
and going to work on a Garden Shed sign.. so lets get started!

I found a board in my scrap wood pile so I just cut it down to the size I wanted and used some
sandpaper to smooth out the edges.

I chose to paint the board white so it would stand out a bit against the dark grey background where
I will be hanging it.
Then I checked the measurements of my board so that I could make a stencil to use for my project.
I used my computer and silhouette to design a stencil for my project and I chose to use a farmhouse style font.
Then I simply used my silhouette to cut out the design with adhesive vinyl.
Then placed the stencil onto my sign and used black paint and a sponge brush to add the words to my sign.
I also went over the edges and different area's of the sign really lightly for a fun rustic look.
(if you'd like to see exactly how I did this I did make a video that is up on my youtube channel)
I knew I wanted to add a fun detail to my sign so I purchased a wood butterfly that I ran across in the store.
I painted the wings a pretty aquamarine shade, then added black paint to the body of the butterfly.
I also gave it the same rustic look that I did to the sign by lightly going over the edges and different area's
of the wings.
I attached the butterfly to my sign with some wood glue, and let that dry.
I am loving how it looks.
To add a hanger I simply drilled 2 holes at the top of the sign and added some jute.
Thinking back I think wire would've been a great option as a hanger and then I could've curled or spiraled the ends for a nice whimsical touch, but I think the jute looks fine too. lol.

I also chose to take it outdoors and give it a couple coats of acrylic sealer to help protect it a little more from the elements, and this project is complete.
Such a fun addition to hang outdoors, and I am loving the bright pop of color with the butterfly.
Project cost:
You know I am about the budget friendly so I thought it would be fun to share project costs, and will try to remember to do that.
For this project, I actually ended up having everything on hand except for the wood butterfly, so this project actually cost me just under $1.00, gotta like projects like that! 😜
Blessings
- Tina
If you'd like to see when I post new video's, simply subscribe to my youtube channel and
click on the bell notification to be alerted when new video's are posted.
Item details:
(*affiliate links)
paint color used on butterfly: aquamarine
If you like this post you can sign up for my blog post notification emails Here !
Or follow me on:
Note: As an Amazon Associate I earn from qualifying purchases!
This page contains affiliate links, which means I may earn a small commission on
items that are purchased through those links. Thank you for your support.
To see more about my: Disclosure Policy Click Here


No comments