Good Morning!
Today I am sharing a furniture update in a fun farmhouse style!
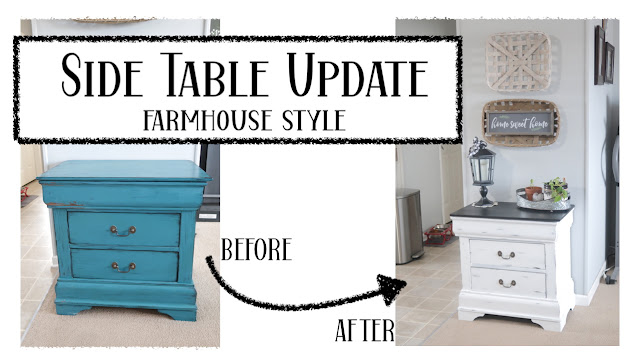
We had quite a winter storm roll through and since I was basically feeling stuck indoors I ended up rearranging furniture and changing several things up in my home. I also took some time evaluating different areas around my home and took some mental notes on the things that I wanted to update and this side table was on that list.

It is one that I had redone years ago in a pretty shade of peacock blue but I am definitely more in to neutral colors these days and this just no longer fit my style preference, so it was time to give it a makeover.

I wiped the cabinet down so I had a clean surface to work with and got started painting.
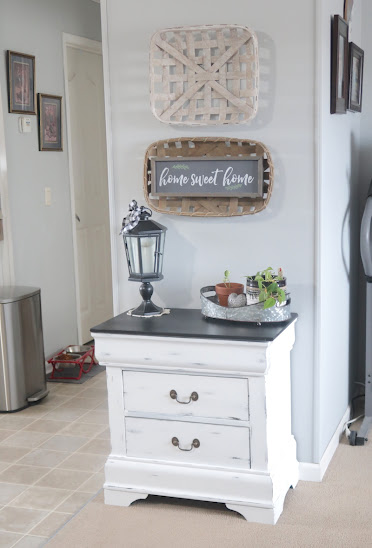
I really want the cabinet to coordinate with some of my other pieces of furniture so I wanted it to be a distressed white cabinet with a black top.
So I started by painting the cabinet black. 😉

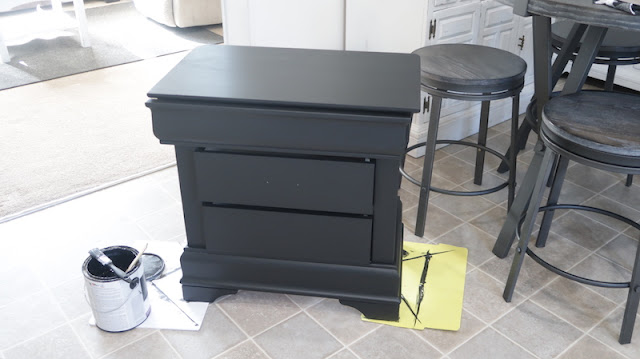
It took more than one coat of paint to get the coverage that I wanted and definitely took some time to let each coat of paint dry well before moving on to the next.

I chose to go with paint that I had on hand, and both of these paints were just ready to use paints from walmart. The black color is onyx black in a satin finish, and the white is called bright white in a flat finish.

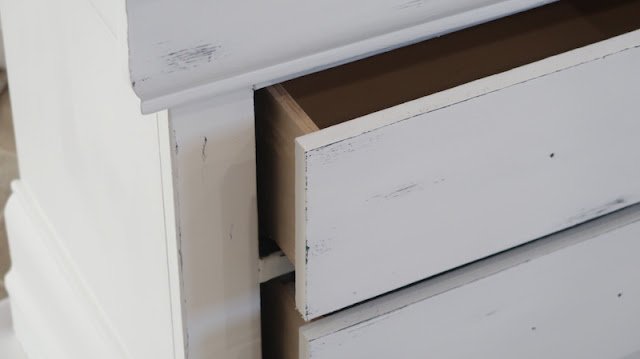
Several coats of paint later and lots of dry time I was able to start sanding.
And as a hack/tip if you like this look but don't want to go to the trouble of all those coats of paint, you can actually just use a fairly dry brush with a tiny bit of paint and lightly go over a piece in different areas to mimic the same kind of look.
Blessings,
Note: As an Amazon Associate I earn from qualifying purchases!
This page contains affiliate links, which means I may earn a small commission on
items that are purchased through those links. Thank you for your support.
To see more about my: Disclosure Policy Click Here
After I paint the cabinet white I want to sand it in different areas to give it a distressed look, but I don't want the blue color to show through.
So by painting it black first that will be my base color, so when I am ready to sand the piece of furniture the black color will show through in those distressed areas instead of the blue. Extra work but so worth it to get the outcome that I want.
I used a fan to try to help speed up the drying time a bit.
I would have preferred to work on this project outdoors but it was still super cold out and I was just ready to work on a project. 😜
So I just roughed it up a bit here and there until I had the distressed look that I wanted.
I showed this in my video because I had a few spots that I wanted to darken up just a bit.
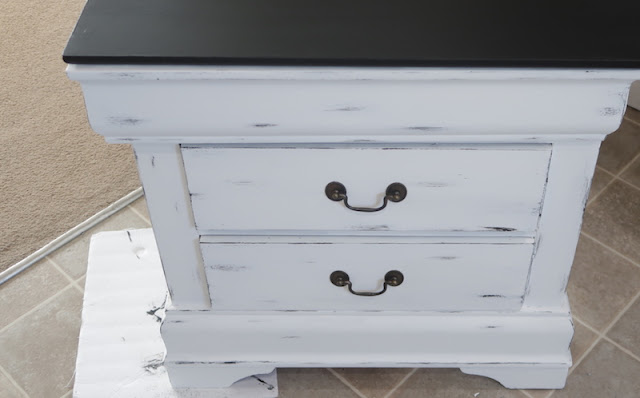
And here is how my little side table turned out! ❤️
I am so happy with how it turned out and because I used what I had on hand it was basically
a zero cost project. Gotta love those type of projects!
I have the video linked below and you can find it here on my YouTube channel.
If you haven't subscribed to my channel yet I share a lot of budget friendly DIY content over there, you can find my channel here.
- Tina
❤︎ Item details:
(*affiliate links)
Stainless Steel Trash Can: Found Here (amazon) or Found Here
My Amazon Storefront: Found Here
(where I share a lot of my favorite items,
and I try to keep it updated with the items (or similar)
that I have in my home & that I have shared in videos etc.)
If you like this post you can sign up for my blog post notification emails Here !
Or follow me on:
Note: As an Amazon Associate I earn from qualifying purchases!
This page contains affiliate links, which means I may earn a small commission on
items that are purchased through those links. Thank you for your support.
To see more about my: Disclosure Policy Click Here


No comments